Troubleshooting Common Home Brewing Problems
Brewing your own beer is a rewarding hobby, but even experienced brewers encounter problems. Don’t be discouraged! This article will help you diagnose and fix common issues, turning potential brewing disasters into delicious successes. It’s a process that requires attention to detail, from selecting the right equipment to understanding the delicate balance of fermentation. If you’re just starting out, familiarizing yourself with essential brewing equipment will set you up for success.
1. Off-Flavors: Identifying and Eliminating the Culprits
Off-flavors are the most frustrating problems. They can stem from a variety of sources. Here's a breakdown:
- Diacetyl (Buttery/Butterscotch): Often a sign of stressed yeast. Ensure your yeast is properly hydrated, oxygenated, and that the fermentation temperature is within the yeast's recommended range. Some yeast strains are more prone to producing diacetyl. Temperature control is key – a stable environment is crucial for healthy yeast activity.
- Acetaldehyde (Green Apple): Common in young beers, this flavor often disappears with maturation. It can also indicate stressed yeast or insufficient fermentation. Be patient; sometimes a little more time is all that’s needed.
- Sourness (Lactic or Acetic): Lactic sourness indicates bacteria contamination. Acetic sourness (vinegar-like) is a more serious contamination. Strict sanitation is critical to prevent these issues. Investing in quality sanitizers and meticulously cleaning your equipment are non-negotiable.
- Cardboard/Wet Dog: Often related to wort chilling. Rapid cooling can contribute to this flavor. Try to chill your wort as gently as possible. Slow and steady cooling allows for better protein coagulation and reduces the likelihood of off-flavors.
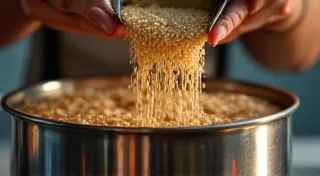
- Band-Aid/Metallic: Can come from chlorine or chloramine in your water. Use Campden tablets to remove these compounds. Water chemistry is surprisingly important in brewing; consider a water test kit to analyze your water's composition.
Image 1: 
2. Stuck Fermentation: When the Yeast Stops Working
A stuck fermentation is when the yeast stops working before the gravity reaches the expected final gravity (FG). This is a serious issue and requires immediate attention. It can be incredibly disheartening to see a fermentation stall, but understanding the causes can help prevent it. For many brewers, tracking gravity readings with a hydrometer is a standard practice.
Possible Causes & Solutions:
- Temperature Shock: Sudden temperature fluctuations can shock the yeast. Maintain a stable fermentation temperature. A consistent temperature is paramount.
- Nutrient Deficiency: Yeast needs nutrients to thrive. Add yeast nutrient (Fermaid O, Go-Ferm) according to package directions. Yeast nutrient provides the necessary building blocks for healthy cell growth.
- Oxygen Depletion: Yeast need oxygen for initial cell multiplication. Ensure proper oxygenation during the initial stages of fermentation (krausen). Oxygenation can be achieved through various methods, including shaking the fermenter or using an oxygen stone.
- High Gravity/Alcohol Content: Extremely high gravity or alcohol levels can stress the yeast. Use a yeast strain appropriate for the gravity of your beer. Selecting the right yeast is crucial for achieving the desired alcohol content and flavor profile.
What to do: Gently rouse the yeast by swirling the fermenter. If that doesn’t work, consider adding a small amount of fresh yeast (but be mindful of the potential for off-flavors). Reaching the correct IBU and SRM can dramatically impact the beer and the required yeast strain. Understanding understanding IBU and SRM will make this crucial decision easier.
3. Hazy Beer: Is It a Problem?
Hazy beer is a surprisingly complex topic. Sometimes it’s desirable (especially in New England IPAs), and sometimes it’s unwanted. Identifying the cause of haze helps you decide if it needs addressing. The visual appearance of your beer is more than just aesthetics; it often provides clues about its composition and potential flaws.
Possible Causes:
- Chill Haze: Appears when the beer is chilled. It's often a mix of proteins and tannins and usually harmless.
- Yeast Haze: Leftover yeast cells contribute to haze. Give the beer adequate time to settle. Patience is key – allowing the beer to clear naturally can improve its appearance.
- Proteins: Unstable proteins from malt can cause haze. Adding Irish Moss or Whirlfloc during the boil can help. These additions help coagulate proteins and remove them from the wort.
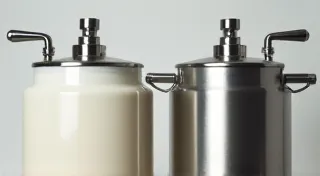
- Unmodified Grain: Improperly processed grains can cause haze.
Image 2: 
4. Foaming Issues: Boil Overs & Fermentation Overflow
Foaming is a common problem, whether during the boil or fermentation. Managing foam effectively can prevent messy spills and ensure a smooth brewing process.
- Boil Overs: Caused by vigorous boiling. Adding cooling wort slowly or adding antifoaming agents (like sorpotol) can help. Gradual additions of wort help to reduce temperature shock and foaming.
- Fermentation Overflow: The krausen (foamy head) can overflow the fermenter. Use a larger fermenter, a blowoff tube, or consider using a fermentation blanket. Proper equipment size is essential for preventing spills and ensuring a controlled fermentation.
5. Sediment Buildup: Trub and Yeast Cake
Sediment, also known as trub (hop debris and coagulated proteins) and yeast cake, is a normal part of the brewing process. However, excessive sediment can affect clarity and flavor. Minimizing sediment is key to achieving a clear and flavorful beer.
Tips for Managing Sediment:
- Cold Break: Chilling your wort quickly after the boil promotes protein coagulation and helps remove trub. A rapid temperature drop encourages proteins to clump together and settle out.
- Careful Transfer: When transferring beer to a secondary fermenter or bottling, try to leave the sediment behind. Gentle transfer techniques minimize disruption of the sediment and prevent it from contaminating the beer.
Image 2: 
Beyond these common problems, the process of homebrewing often requires adjustments and fine-tuning based on your specific equipment and environment. Experimentation and a willingness to learn are essential for continuous improvement. Remember that selecting the correct yeast strain and understanding how it reacts with the wort is a critical aspect of homebrewing. Don't forget to properly maintain your air locks to ensure a sanitary and controlled fermentation environment.
By understanding these common problems and implementing these solutions, you can significantly improve your home brewing success and enjoy delicious, well-crafted beer.